Showing posts with label Spring. Show all posts

Friday, 5 June 2015

Jamie's Quiche Lorraine


Jamie Oliver's Recipe for Quiche Lorraine.
Tea/ Dinner/ Lunch/ or a good nibble for a party/ Savoury Tart  


Since I've been a sweet and healthy treats baking maniac, I thought I'd post a savoury recipe that I borrowed from the brilliant +Jamie Oliver. This savoury tart is the perfect summer tea whether you pair it with a salad and new potatoes, go full out with your BBQ spread and have it as an extra side or take it to party where it'll be sure to be a knock out nibble shared amongst friends and family. It's deffinatly a great sharing dish and a traditional occasion dish for the whole family.
Lets get cooking...!
 
 
Jamie's Quiche Lorraine Recipe
 

Ingredients:

Filling:
140g Ham
140g Gruyere Cheese, grated
140g Bacon, Diced or Lardons
1 tbsp. Butter  
250ml Milk
250ml Crème Fraiche 
2 Eggs
2 Egg Yolks
A Pinch of Nutmeg
 
Pastry:
500g Flour
1 tsp Salt
130g Unsalted Butter
2 Egg Yolks

Or
Pre-made Short Crust Pastry


Instructions:

 
Pastry:
1. For the pastry, combine the flour and salt in a food processor. Add the butter and egg yolks and process for 1 minute.
2.Then add about 4 tablespoons of cold water and pulse until the dough is combined.
3.Transfer to a lightly floured surface and gently kneed for 2 minuets, or until the dough is just combined.
4. Flatten to a disc, wrap in clingfilm and refrigerate for at least 1 hour.
5. Remove the dough from the fridge and rollout on a lightly floured surface to about 5mm thick.
6. Lay the pastry over a round 32cm tart tin, 4cm deep and carefully press in to the base and the sides. Trim any excess with a sharp knife.
7. Line the pastry with grease proof paper and refrigerate for 30 mins.
8. Pre heat the oven to 180C/gas 4. To blind bake the pastry, fill with pastry weights, rice, beans or lentils and bake for 15 mins.
9. Lift out the weights and bake for another 5 mins.
10. Remove from the oven and place the tin/ ceramic dish on an oven tray and leave to cool.
 
** If using ready bought pastry follow pastry steps 6 -10. **
 
 
Filling:
1. Meanwhile, melt the butter in a frying pan and cook the bacon or lardons. After cooked drain on kitchen paper and allow to cool.
2. Combine the ham, cheese and bacon and spread evenly over the cooled pastry case. Pre- heat the oven to 190C/gas 5.
3. Whisk the crème fraiche, eggs, egg yolks, milk and nutmeg in a bowl. Carefully pour the mixture into the pastry case.
4. Bake the quiche in the oven for 40-45 minutes until the filling has set and top is beginning to turn golden. Remove from the oven and allow to cool in tin/dish.
 
...once cool and ready to serve

Enjoy!
 

Per serving 519 cals, 34.5g fat (17.8g saturated), 16.2g protein, 34.7g carbs, 4.5g sugars


If you enjoyed this post give it a +1 and don't forget if you recreated this recipe tag me on instagram (@apesjackson) and twitter (@aprilroseo) and give Jamie Oliver a shout out too! (+Jamie Oliver). As always I hope you give this recipe a try, you wont be disappointed! It's by far the best quiche I've probably ever eaten, as say's the rest of my family too, when we had it for tea with jersey royal new potatoes, salad and chunky sliced tomatoes. (Certainly filled the hole and was absolutely delicious at the same time!)
 
Much love,  -A
Xx


That's all for now folks,
 

XOXO -A
<3 


Monday, 1 June 2015

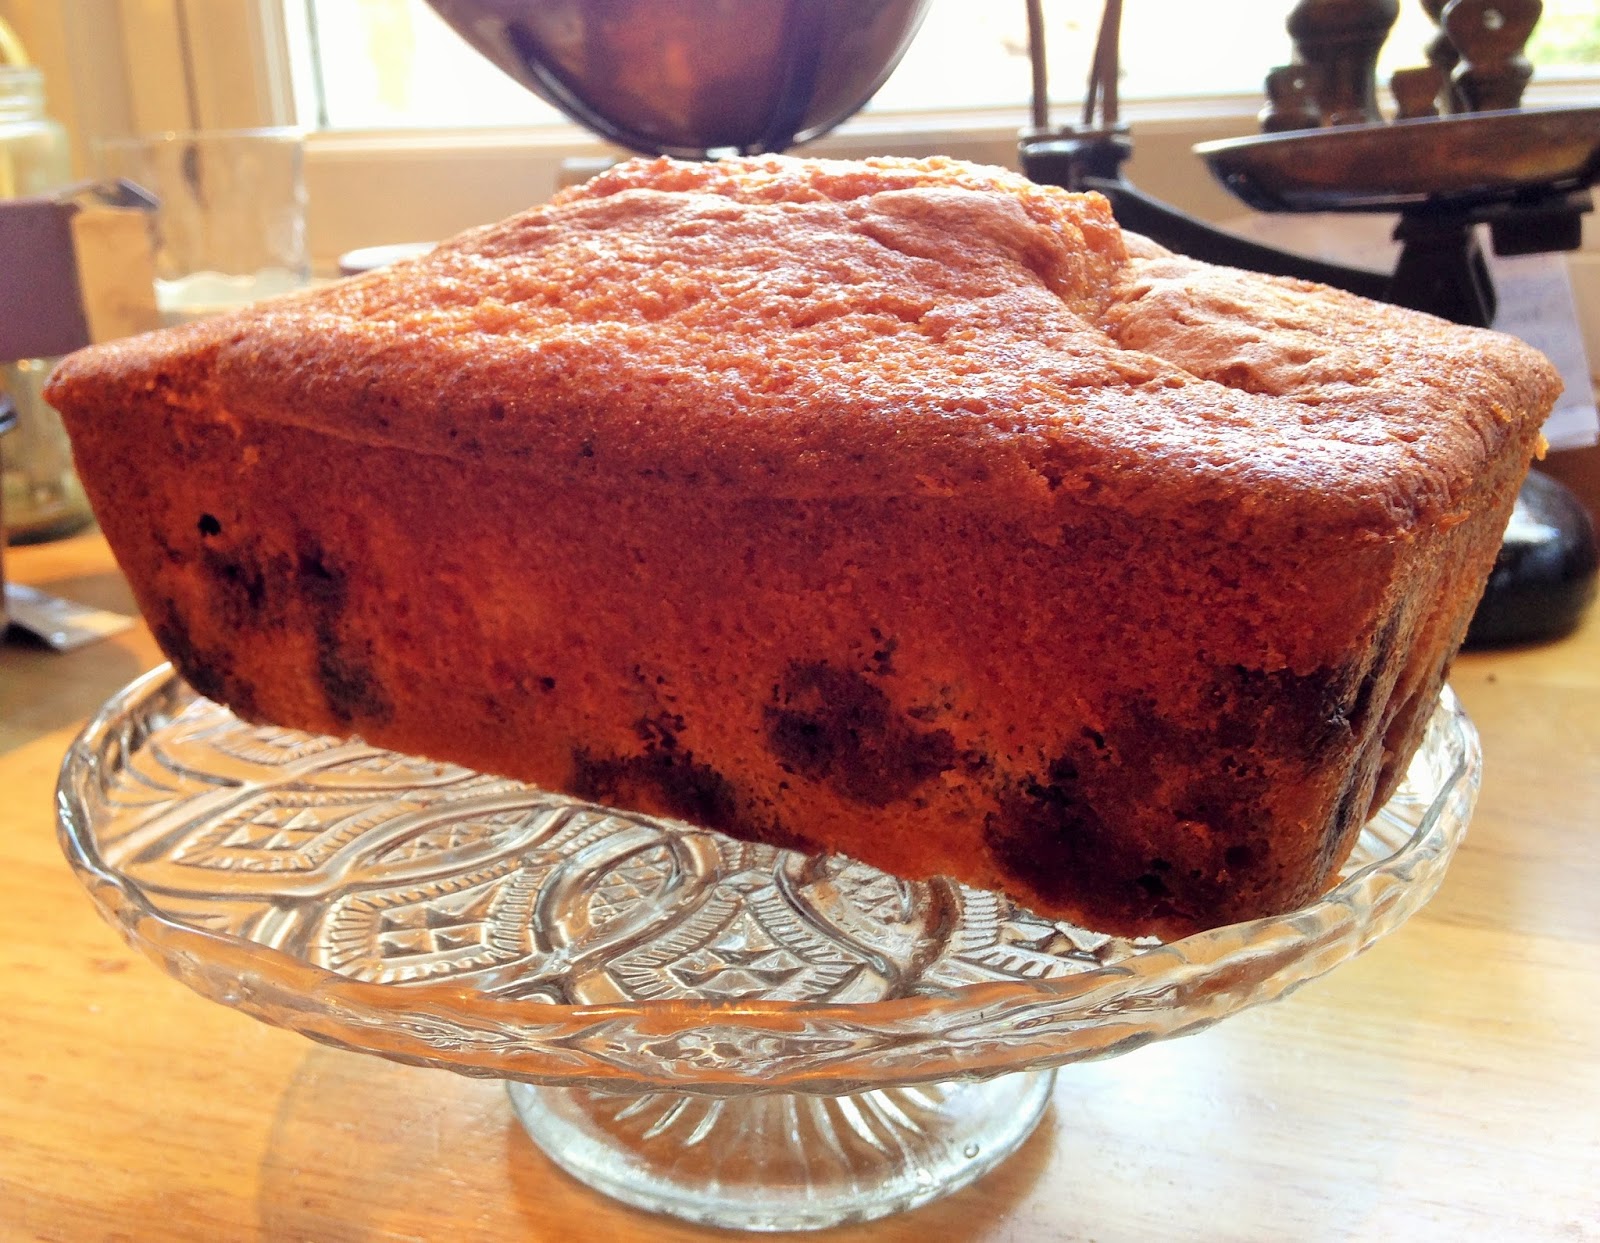
Blueberry and Lemon Drizzle Loaf.


For all those cake lovers out there...

My Blueberry and Lemon Drizzle Loaf Recipe should hit the spot.


With my last recipe being a Healthy Banana Bread, using natural ingredients, a refined sugar free and vegan etc. treat I thought it was only right to post a classic cake treat recipe to cover a wider range of treat lovers out there. So, with baking on the brain I thought I'd cook up a well loved cake by my mum and brothers that always gets some love. Baked especially for my mum, who loves a good blueberry anything! It'll be sure to go down a treat. This is my own adaptation of a few standard blueberry and lemon sponge recipes and is super quick and easy to bake up. For a beautifully moist, zesty loaf this is the perfect recipe (If I do say so myself...;) )


Blueberry and Lemon Drizzle Loaf Recipe


Ingredients: 

 
200 grams Self Raising Flour 
175 grams Non- Salted, Soft Butter or Margarine 
125 grams Caster Sugar 
110 grams Fresh Blueberries 
3 eggs 
1tsp Baking Powder 
1 Lemon Zest 
1/2 Juice of a Lemon 
100g Icing Sugar
1 1/2 tsp Vanilla Essence
 

Alterations & Tips:
 
  • Fan of nuts? To crunch things up a little bit a good addition to this loaf would be Almonds. Although, you could add any nut or dried fruit you like; peanuts and strawberries I'm sure will make a great adaptation or coconut and raspberries... take your pick! You could even sprinkle a few extra almonds or lemon zest on top for decoration.
      
  • It's best if your lemons are a few days old as this will make grating the zest easier and the skin will be less waxing and rubbery (which can prove difficult grating in a calmly manner! :)).
  
  • Its important to use soft margarine as this helps the mixing of the ingredients and blending becomes a lot easier, it also gives the mixture a lighter, fluffier texture.

  • This recipe creates an icing that is lemon flavoured and transparent, meaning it is quite runny and more like a drizzle cake icing. Depending on the type of icing you prefer you can add more or less lemon juice and icing sugar to create your desired consistency. For a slightly different effect to the drizzle you could use lemon curd to create a thick glaze the top and/or sides of the loaf giving a richer, sticky sponge flavour.
      
  • A tip when opting for the drizzle/ runny icing (which is directed by the recipe) to ensure you get the most flavouring within the sponge poke a knife straight through the sponge several times, creating slits and allowing the sponge to absorb the icing and its amazing lemony goodness all the way through aiding to a moist and zesty sponge.


Instructions:

(Scroll down for step illustrations.)


1. Heat the oven to 180°C and grease your 2lb loaf tin. (You could use a standard cake tin or larger loaf tin, although you may need to double the ingredients to get a full loaf and the baking time may need to be adjusted, if using a smaller tin the time will need to be increased and if larger, time reduced. The general rule is if it is golden brown, the sponge bounces back and a skewer poked through comes out clean, your good to go.)
 
2. Firstly, in a large mixing bowl beat the butter and caster sugar together till fully combined creating a light and fluffy, cream like texture. (Pictorial steps below.) 
 
3. Then crack your eggs in to a smaller mixing bowl and beat with a fork until fully combined. After, slowly add the egg to the butter mixture 1/3 at a time, making sure you fully stir in between. This helps the mixture to not separate.
 
4. Sieve the flour over your sponge mixture and add the baking powder. Gently fold in to the current mixture until fully combined with a smooth texture.
 
5. Then, add the lemon zest and 1 1/2 tsp vanilla essence and gently stir in.
 
6. On a separate surface pour out the blueberries and sprinkle half a hand full of self raising flour. Tossing the blueberries until lightly covered. (This will help the blueberries not to sink to the bottom within the mixture when baking.)
 
7. Carefully pour the blueberries in to the sponge mixture and stir once or twice, until the blueberries begin to disperse within the mixture.
 
8. Pour the mixture into the prepared loaf tin and smooth over. (to ensure not all the blueberries sink sprinkle half a handful over the top on the mixture in the tin, at this step you could also add a handful of almonds, dedicated coconut, white chocolate shavings or your preferred chosen nut.)
 
9. Bake in the oven for 45-55 minutes (if using the standard recipe and 2lb loaf tin in a preheated oven this should take nearer the estimated 45 mins. mark). When done the cake should be golden brown with the sponge well risen. A good check is to poke a skewer through and it should come out clean. Leave to cool on a wire rack still resting inside the cake tin.
 

Decoration.

 
10. Once cooled and removed from the loaf/ baking tin its time to decorate with the prefect lemon drizzle. In a small mixing bowl combine the icing sugar and lemon juice and stir well until smooth (this can be altered by using the previously mentioned alterations and tips.)
 
11. Once the icing is made, grab a sharp knife and gently stab the sponge several -  half a dozen times creating straight through slits randomly in the sponge. Then pour the icing mixture over the sponge. You can leave to set in the fridge or slice up and enjoy with a runny, slightly messy but amazingly tasty icing. (Depending on the icing consistency you may want to do this on a plate or chosen dish for the loaf to sit on, it can get a bit messy but that's half the fun and adds to the rustic, family favourite and kid friendly look to the loaf.)
 
 *
 
For extra decoration why not try a little more lemon zest grated over the top, flaked almonds or white chocolate shavings depending on your previous personal additions to the recipe. To serve add a warm  blueberry compote, hot/ cold custard, a generous scoop of vanilla ice cream or, my favoured and most recommend, Double Cream. (Double cream soaks through the sponge, giving you a welcomed gorgeous creamy bowl of greatness.) If your feeling extra generous and indulgent Extra Thick Double Cream is most defiantly always a good idea!  ;)  (It's a thick, creamy and heavenly DREAM! Also my absolute favourite!!!) Can you tell I like double cream yet...?
 
P.s Whipped cream is also just as good, go crazy! It's even been known to 'butter' a slice with a seasonal jam or add clotted cream on the side. Personally I like the classic cream and cake combo but whatever takes your fancy is the way to go!!!
 
  *


Baker's Top Tip: Sinking fruit.

 
If you still have a problem with your fruit sinking, whether its the blueberries or another fruit you have chosen, here are a few tricks that could help avoid this:
 
  • Toss the berries/ fruit in flour (the flour used within the recipe) to help stabilize and support the fruit in the mixture.
  • If this fails, your mixture may be too runny, try thickening it by adding more flour or slightly less fluid too your mixture (Be careful not too disrupt your ingredients ratios too much, but just enough on either side to thicken the mixture.
  • You may also want to try using frozen fruit instead of fresh, frozen fruit has less moisture than fresh fruit therefore being lighter in the mixture (when adding to the mixture, add the fruit still frozen and not defrosted as this will avoid staining the sponge too much and help the fruit keep its texture and shape.)
  • Lastly, you may be stirring in your fruit too vigorously, and if possible adding the fruit at the very last minute may help avoid it sinking early on. If you can try adding the fruit when the mixture is already in the loaf'/ cake tin, just gently pouring over the top and lightly tapping, pressing in the odd few it may help the fruit from sinking too dramatically. You could also try spooning in half or 1/3 off the sponge mixture (Minus the blueberries) and add some of the blueberries and keep layering like this until all the mixture and berries are used. (Its best to divide the mixture and berries in to 1/2 or 1/3, meaning two or three layers.)
It's important to note that when using heavier, weighty additions to a sponge, like fresh fruit or dried, they will always sink a little bit, it's just gravity! So, don't feel like your doing something wrong, its every bakers battle!


(Side note- I may or may not have been a little too camera happy, but the more the better right...?!)


A generous slice for the baker (as always ;)) and my recommended serving of double cream. Ahh pure heaven...! If you don't believe me give it a go for yourself! I dare ya ;)

As always, I hope you enjoyed this blog post and give this recipe a try! If you've tried out any of the mentioned alterations and additions to the recipe comment below or tag me on instagram and twitter. (@apesjackson and @aprilroseo) I'd love to see what creations you've come up with! I've spent all day concocting a list of fab and wacky fruit, nut, flavours and sponge combos, give the post a  +1  if you'd like to see me create and post them on my blog.

Much love,  -A
Xx


That's all for now folks,
 

XOXO -A
<3

Wednesday, 6 May 2015

Grunging it up.

May-day for those layers.


With the weather on that rollercoaster transition, loading up those layers will undoubtedly save your skin!

My fave go to layering piece is the classic and no where near underappreciated Tartan Shirt. This staple has always popped up and been on tend, whether its the grungy style of Emily Field from PLL (calling all Pretty Little Liars fans out there ;)) or Cara Delevingne on the go.


Turn that comfy lounge outfit in to a May day staple, I've layered a light stripe tee over a black vest, of course thrown on my trusty tartan shirt, my comfiest leggings, and slipped on my rose gold slipons.
 
For similar items check out these links...  
 
 
That's all for now folks,
 

XOXO -A
<3

Sunday, 26 April 2015

Embrace the Chic in Spring Chick.


Highlight That Spring Glow.

My top three tips and spring trends that'll get you looking and feeling like that spring sunshine.

The Beachy wave.

Get those locks looking chic and summer ready! Light and bronzy highlights or a cute ombre was all the rage last summer but why wait for the trends when you can be the trend setter?! Either way, it'll be sure to embrace the spring shine and add an unmissable glow! And of course you can't forget about that classic beachy wave that gives all the signs of an effortless, natural radiance. (To avoid using heat tools and damaging those locks that we want looking super soft and healthy just plait your hair before bed and it truly will be effortless and look totally chic chick ;)).


Its all about the Sierra.

Take a stunning sunning selfie and add that old school, LA sunshine chic you'll be sure to be noticed for. (Instagrams Sierra Filters up there for that spring flair).
 

Dash of baby pink to make the world wink. ;)

Become a part of spring and embrace your inner flower. Pink is my fave colour (if you couldn't tell by the blog...) and it's the perf colour to brighten up any spring day, not mention it's a classic, chic staple whether your going for the cute girly girl or the soft grunge vibe or jazzing up that festival look and anywhere in between.


Don't forget to comment anymore spring trends or top tips you'll be sure not to be with out in the upcoming spring months. Once again, that's all for now folks, see you next time!

xoxo -A
<3

Tuesday, 21 April 2015

Tuedays Newsday. Outfit of the day.


Perfect for that spring shine and those spring chills.


The very first post for the Tuesdays Newsday series. Most loved spring outfit.

Tuesdays Newsday; every Tuesday you'll get a quickity snipity blog post about my Tuesday. Ranging from outfits of the day to an embarrassing (and hilarious, as they always are...) experience.

(...what have I let myself in for?!)
 
But let's get back to the main aim of the post shall we? #Ootd ;)  


In my opinion, layering those light knits over a pretty floral cami will be sure to give you the double take look this spring. Pairing with your fave comfy leggings (Spot the white paint on mine... opps. It just comes with the Art Student territory). Matching this look with the cutest, on trend shoe, the classic slip on and brightening up with rose gold, the prefect colour for spring! The light toned metal defiantly adds a shine and glow to any outfit. (This is deffo my go to spring shoe!) For extra oomph I added a ditsy floral ring, simple gold midi ring and my rose gold (surprise, surprise...) watch from Olivia Burton.

To Transition in to the evening swap up your light knit for your fave leather jacket (I went for my fave brown biker jacket!) Grab the classic, black structured mini satchel and maybe give a dark pink or red lip a whirl.

 
Items featured:
Rose Gold Slip Ons- H&M, ASOS & Ted Baker (via Asos)

(All links are the exact if not similar products shown/mentioned in images above).

So, grab those shades and enjoy the day in a rocking spring look!
Be sure to comment any of your fave outfits of the day or maybe your go to spring item! :)


To get my go to spring hair look, check out my previous BlogPost 'Getting your crimp on' http://bitches-be-blogging.blogspot.co.uk/2015/04/getting-your-crimp-on.html


xoxo -A
<3


Sunday, 19 April 2015

Spring Flower.


Spring has sprung.


Its that time of year again, when the suns out and the blossoms blooming. Spring has sprung. As much as I love a good winter month, a chunky knit and beautiful boot, spring has rapidly become my favourite time of year.
 
Easter of course (Besides the Religious meanings), is daffodils and chocolate. But there's so much more. For me, having two weeks home from uni, its the perfect time to catch up with old friends and family. The clocks go back, the evenings become lighter and your whole perspective of the day shifts. Whether your experiencing the sunny glows of spring or the light April showers that entail with the season change. There's no doubt a view of blossom, a light knit, a book or friendly face joined with a cup of tea, hot cross bun or a homemade Victoria sponge will brighten and cheer up any day.
 
(And of course you can't forget those Easter cakes)


xoxo -A
<3